This entry describes a little spinoff (spun-in?) project that happened during game development.
For all kinds of reasons, I needed a utility bitmap class. Just a place to load and save bitmaps and move them around. For example, on their way to become texture maps or font.
Easy enough, for my purposes 8 bits each of RGBA is fine.
class OmImageRgba8 : OmObjectBase
{
public:
    int width = 0;
    int height = 0;
    uint32_t *pixels = 0; // malloc'd, disposed with instance
    OmImageRgba8(int width, int height);
   ~OmImageRgba8();
    void setPixel(int x, int y, uint32_t pixel);
    uint32_t getPixel(int x, int y);

    bool writeFile(std::string filePath);
    static OmImageRgba8 *readFile(std::string filePath);
}
So about ReadFile and WriteFile. I do love writing everything myself… up to a point. I’m often put off my the complexity of using Other People’s Code, when it becomes mired in a tangle of still more Library Dependencies. Makes it hard to build my project.
Happily, I found “plain old code” libraries for PNG and JPG. By “plain old code” I mean, it’s a small number of source code files that just work on a normal compiler.
LODEPNG by Lode Vandevenne for reading and writing PNG files.
JPEG-COMPRESSOR by Rich Geldreich, for reading and writing JPG files.
These were both very easy to integrate. The ::readFile() and ::writeFile() methods on OmImageRgba8 simply look at the file extension to choose which, and only work if it’s .jpg or .png.
More features crept in over time. Some images arrive Y-up, others Y-down, so ::flipY() was added.
For debugging, it’s handy to imprint text information onto a bitmap, so ::drawF(uint32_t color, const char *fmt, …) was added. It uses a simple 8×8 pixel font. I came across this handy font some years ago, and must share its origin. The link is http://overcode.yak.net/12. It was a small image which I decomposed into static C data.
char font8x8[] =
{
…
0x08,0x49,0x2a,0x1c,0x2a,0x49,0x08,0x00,   // 0x2a '*'
//   . . . . @ . . .
//   . @ . . @ . . @
//   . . @ . @ . @ .
//   . . . @ @ @ . .
//   . . @ . @ . @ .
//   . @ . . @ . . @
//   . . . . @ . . .
//   . . . . . . . .
0x08,0x08,0x08,0x7f,0x08,0x08,0x08,0x00,   // 0x2b '+'
//   . . . . @ . . .
//   . . . . @ . . .
//   . . . . @ . . .
//   . @ @ @ @ @ @ @
//   . . . . @ . . .
//   . . . . @ . . .
//   . . . . @ . . .
//   . . . . . . . .
…
};
The font was designed by John Hall, and on the website above, he also documents some other code and tech work, and some aeronautical items, and his descent and demise due to skin cancer. So I always think a few kind words of thanks to this unknown and lost fellow coder and this one part of his legacy that I use. Thanks John.
And somewhere along the way I wanted to do some generative art, so added a basic antialiased Rectangle Fill method. Handles the edges and corners special for partial coverage, and fills the broad interior. Fun enough.

But that slippery slope let up to September 2022 when I thought, All the cool kids have implemented a scanline polygon fill, it’s time for me.
Filling polygons is kind-of a big bother, keeping track of edge lists and numbers and stuff. Oh well! Computers and programmers love that kind of thing. Here’s the basic approach.
I’ll define polygon as one or more closed loops of straight edges. The polygon is defined by the vertices, and each vertex is shared by two edges.
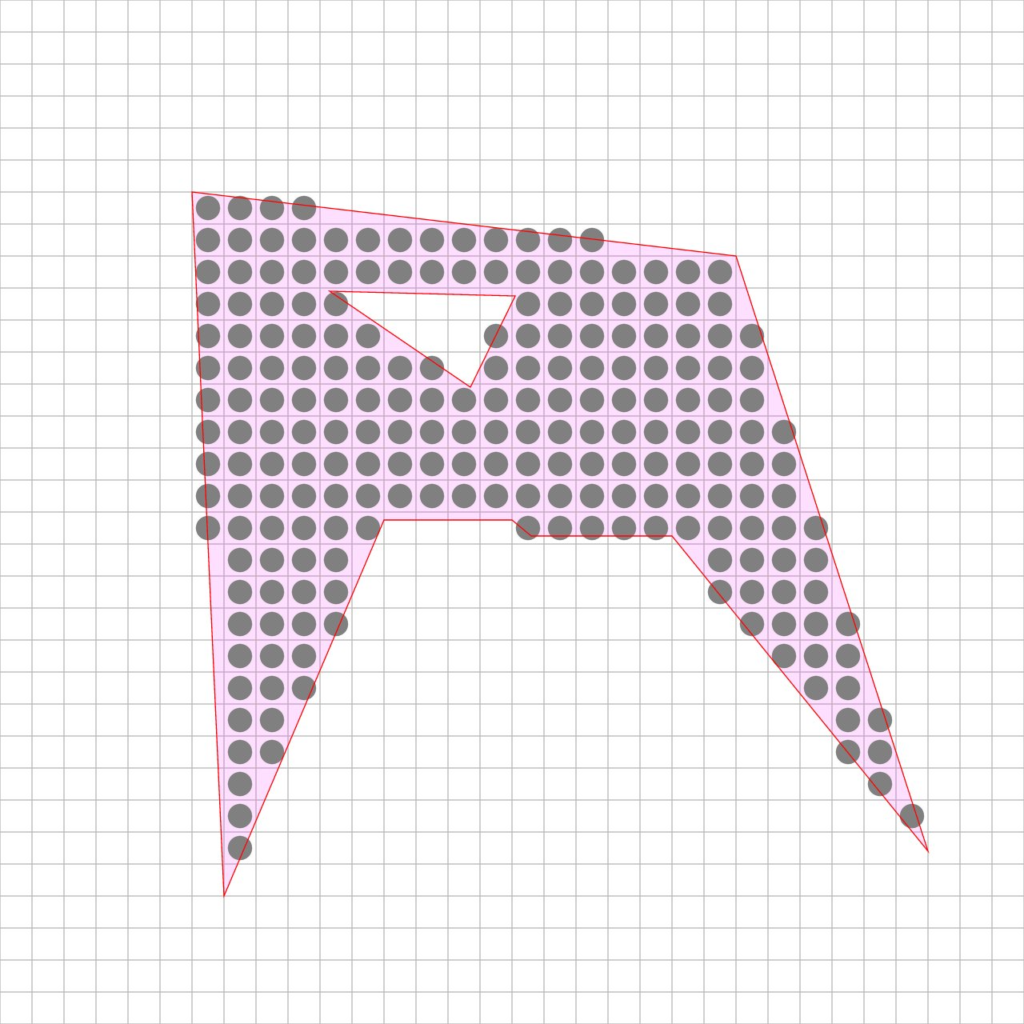
For a simple polygon fill, we fill each pixel if and only if the center of the pixel is within the polygon.

(We’ll discuss partial coverage later, I promise.)
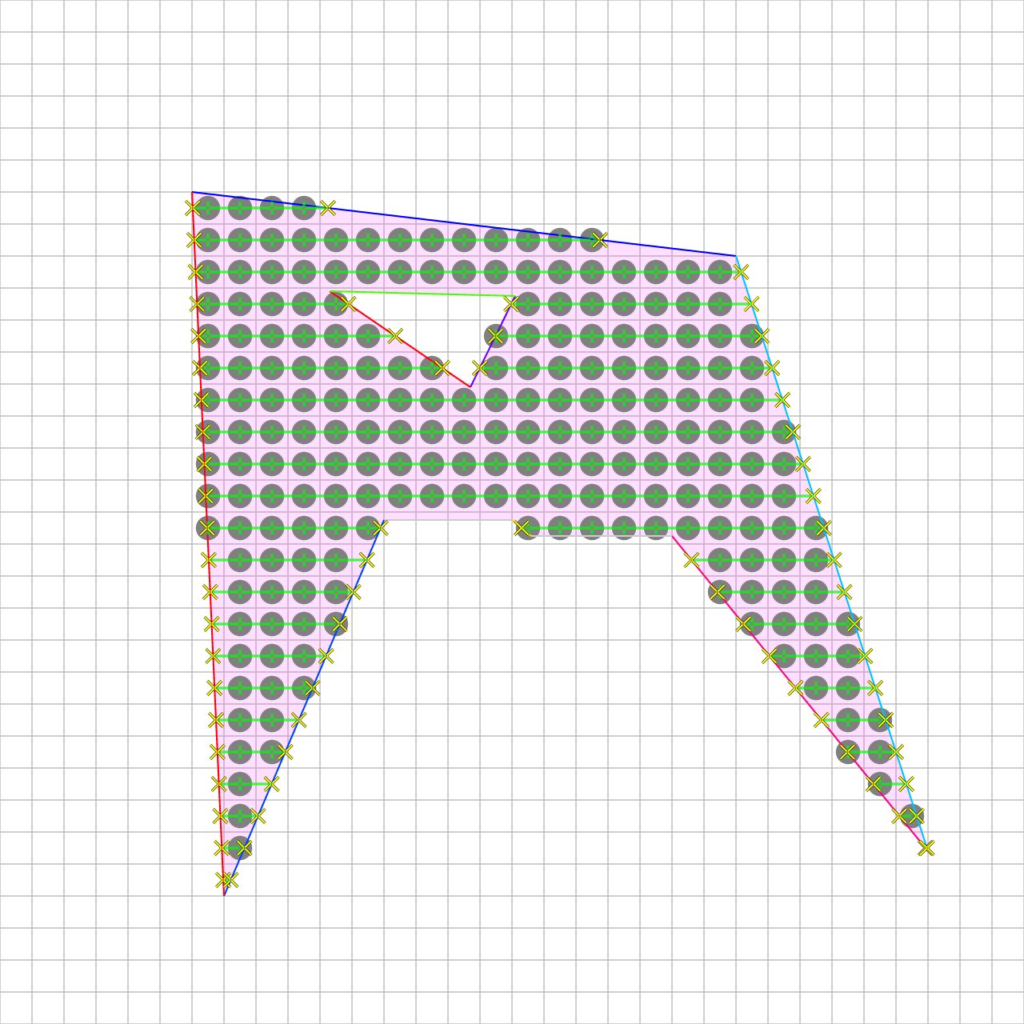
Essentially, we want to ask each and every pixel, “Is the center of this pixel within the polygon.”

For each row (or “scanline”) we determine which edges encompass the something-point-5 part of the row. There will always be an even number. Then find the x-position of each of these. Then we fill in pairs, only those pixels within an x-pairs span.
Some simple optimizations include:
• presorting all the edges by lower-y value, so you just look at the next one to see if its in Y range
• using an x-step value for each active edge, as we step down each scanline, because we do render the scanlines sequentially
• discard horizontal edges, or any edge that doesn’t traverse a Y-point-five boundary
At first it did seem like a bother, but it all became easy to implement.
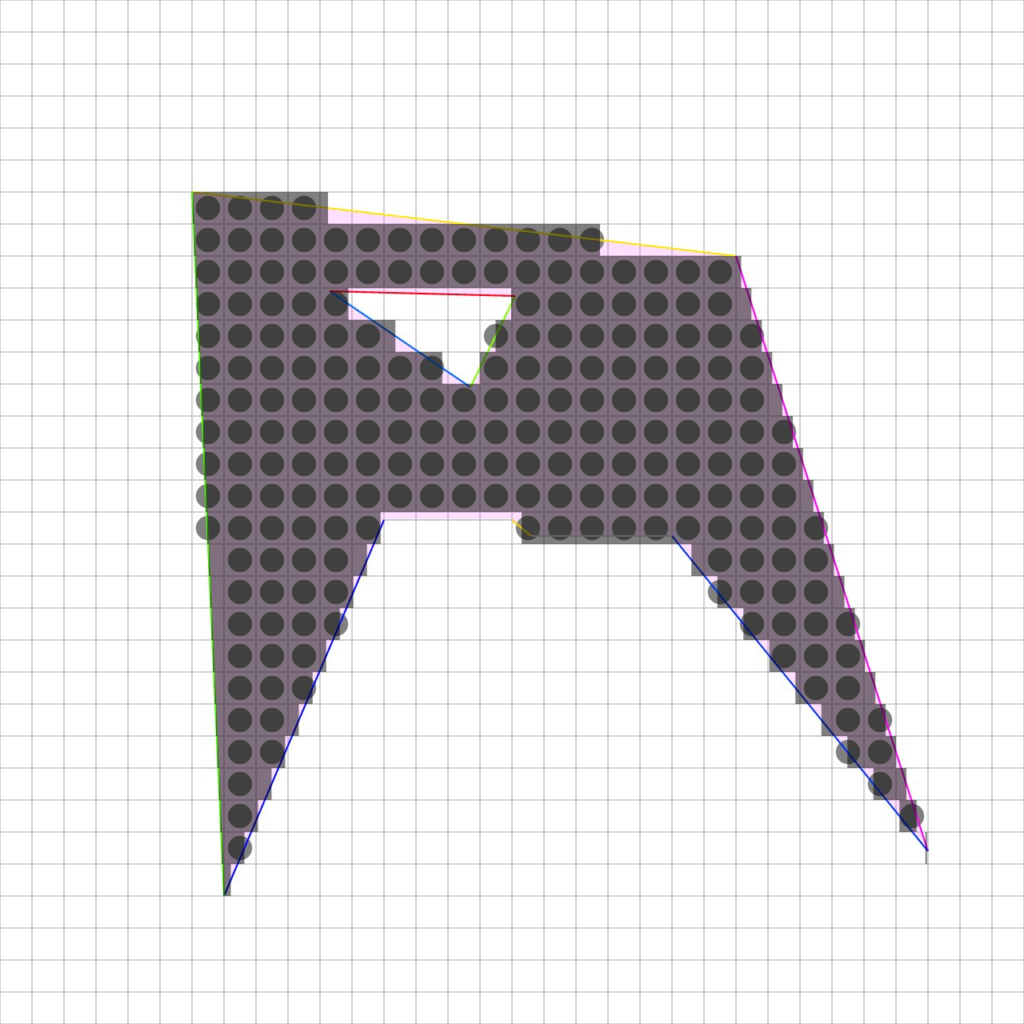
What about antialiasing? The output looks pretty blocky without it. You can always render bigger and scale down, perfectly respectable solution.
One easy thing I was tempted to try was, incorporate the x-position of each edge for partial coverage.

Alas this would only help the side edges, and not the top edges, and just look funny
But… look closely at these illustrations. Go ahead, zoom in. They were all drawn using OmImageRgba8 and OmPolygon filling. And they’re antialiased very nicely! Next post will demonstrate a nice antialiasing technique that builds on this edge-sorting, and doesn’t involve downscaling.
